Hot Tub Wiring Guide: Safe Installation Tips for 2026
Thinking about adding a hot tub to your home? While the rewards of relaxation are clear, the risks of improper hot tub wiring are often overlooked. With home spas more popular than ever and electrical standards evolving for 2026, it is essential to ensure every installation meets the latest safety codes. Proper hot tub wiring not only protects your investment but also keeps your family safe and compliant with regulations. This guide walks you through every step, from understanding electrical requirements and planning to code compliance, installation, safety best practices, troubleshooting, and ongoing maintenance.
Understanding Hot Tub Electrical Requirements
Owning a hot tub is rewarding, but understanding hot tub wiring is crucial for a safe and reliable installation. Whether you are considering a simple plug-and-play spa or a high-powered luxury model, electrical requirements will shape your project from the start. Let us break down the essentials for homeowners planning a new hot tub in 2026.
Voltage Options: 120V vs. 240V Hot Tubs
The first decision in hot tub wiring is choosing between 120V and 240V systems. A 120V “plug-and-play” spa connects to a standard household outlet and typically draws 15-20 amps. In contrast, most modern hot tubs require 240V “hard-wired” service with 30-60 amps, offering faster heating and greater energy efficiency.
| Feature | 120V Plug-and-Play | 240V Hard-Wired |
|---|---|---|
| Amperage | 15-20A | 30-60A |
| Installation | Simple, plug into outlet | Requires dedicated circuit |
| Heating Speed | Slower | Faster |
| Energy Efficiency | Lower | Higher |
| Typical Models | Entry-level, small spas | Most modern, full-size spas |
Over 80% of new hot tubs in North America now require 240V wiring, according to a 2025 industry report. These systems demand a 4-wire setup (two hots, neutral, ground) to meet both performance and code requirements.
Keep in mind, hot tub wiring impacts your home’s electrical load. Before installation, check your service panel’s capacity to avoid overloads. Models like the Jacuzzi J-235 (120V) and Caldera Utopia Series (240V) illustrate the range of available options.
Key Components of Hot Tub Electrical Systems
A safe hot tub wiring installation relies on several key components:
- Main Circuit Breaker Panel: Supplies power and houses the main disconnect.
- Outdoor GFCI Disconnect Panel: Required by the National Electrical Code (NEC), this must be weatherproof and located at least 5 feet but within sight of the hot tub.
- Spa Control System Box: Receives wiring from the disconnect and distributes power to pumps, heaters, and accessories.
- GFCI Protection: Essential for preventing electrical shock, especially in wet environments.
- 120V Receptacle: NEC requires a standard outlet within 10-20 feet of the hot tub for maintenance tools or accessories.
- Proper Grounding and Bonding: Prevents stray voltage and ensures safety.
GFCI protection is non-negotiable for all hot tub wiring. It instantly cuts power if a fault is detected, reducing the risk of electrocution. For the latest code details, consult the NEC Requirements for Spas to ensure compliance in your region.
Remember, the outdoor disconnect must be accessible, and all metal parts around the hot tub must be properly bonded. These requirements protect users and are enforced during inspections.
Common Wiring Configurations
Hot tub wiring configurations have evolved. Modern installations use a 4-wire system: two hots (black, red), one neutral (white), and one ground (green). Older 3-wire setups lack a dedicated ground and are no longer code-compliant for new spas.
| Wire Color | Function |
|---|---|
| Black | Hot (L1) |
| Red | Hot (L2) |
| White | Neutral |
| Green | Ground |
Mixed-voltage components are common. For example, a 120V ozonator may operate alongside a 240V heater in the same spa, so always review the manufacturer’s manual for specific hot tub wiring instructions.
Using the right configuration ensures your hot tub wiring meets the latest safety standards and supports all spa features. Never attempt shortcuts or rely on outdated diagrams.
Planning Your Hot Tub Wiring Project
Planning your hot tub wiring project is a critical step that can make or break your spa experience. Careful preparation ensures your installation is safe, reliable, and compliant with 2026 standards. Let us walk through the essential planning steps, from checking your home’s electrical capacity to understanding code requirements.

Assessing Your Electrical Service Capacity
Before starting hot tub wiring, determine if your current electrical system can handle the new load. Most homes have a 100A, 150A, or 200A main service panel. Hot tubs, especially 240V models, often need a 50A dedicated circuit. However, the total amperage of all your breakers does not equal the panel’s true capacity.
If your panel is already crowded or you experience frequent breaker trips, you may not have enough capacity for safe hot tub wiring. Look for these warning signs:
- Breakers that trip often
- Flickering lights when appliances run
- Limited open breaker slots
- Outdated or corroded panels
For example, if your hot tub requires 50A and your main panel is rated at 150A, you must calculate your existing household load to ensure you stay within safe limits. A licensed electrician can help with accurate load calculations. If an upgrade is necessary, consult this home electrical panel upgrade guide for expert advice.
Never guess when it comes to hot tub wiring. Proper load assessment protects your home and ensures the longevity of your spa.
Site Preparation and Layout
Choosing the right location is vital for hot tub wiring safety and convenience. The area must be accessible for maintenance, far from overhead power lines, and meet clearance requirements.
Tips for site selection:
- Ensure a flat, stable base for the hot tub
- Maintain at least 22.5 feet from overhead conductors, as required by code
- Place the GFCI disconnect panel at least 5 feet from the edge of the spa, and within line of sight
- Plan a route for conduit that avoids sharp bends and minimizes exposure
When running conduit, decide between above-ground and underground options. Underground conduit must be buried at the correct depth, typically 18 to 24 inches. Use sweep elbows for easier wire pulls and inspect the route for hazards.
Proper site preparation streamlines the hot tub wiring process and reduces the risk of future issues. Always double-check manufacturer instructions and local guidelines before finalizing your layout.
Permits, Inspections, and Local Codes
Hot tub wiring projects require proper permits and inspections to ensure compliance with safety standards. Municipalities often have specific rules that may differ from the National Electrical Code (NEC). Obtain all necessary permits before starting any work.
Inspections are typically scheduled at key milestones, such as after rough-in wiring and before energizing the spa. Skipping these steps can lead to fines, insurance complications, and significant safety risks.
For example, some cities mandate that only licensed electricians perform hot tub wiring. Toronto bylaws require an ESA inspection for all spa installations. To avoid costly mistakes, research your local code or consult a professional.
By following these steps, you ensure your hot tub wiring meets all legal, safety, and insurance requirements.
Step-by-Step Hot Tub Wiring Installation Guide
Installing hot tub wiring safely and to code is essential for your family’s safety and the spa’s longevity. This hands-on guide walks you through every critical step, from preparation to powering up, ensuring your installation is secure, compliant, and ready for enjoyment.
Step 1: Gather Tools, Materials, and Documentation
Before starting any hot tub wiring project, assemble all essential tools and materials. Proper preparation minimizes mistakes and ensures a smooth workflow.
Essential Tools:
- Voltage tester
- Wire strippers
- Conduit bender
- Cordless drill and bits
- Screwdrivers (flathead and Phillips)
- Adjustable wrench
Materials Checklist:
- Copper wire (typically #6 AWG for 50A circuits)
- Rigid or flexible conduit (PVC or metal)
- GFCI breaker and disconnect panel (UL-listed)
- Weatherproof electrical boxes and fittings
- Wire nuts, clamps, and mounting hardware
Review the hot tub manufacturer’s wiring diagram and installation manual thoroughly. Confirm all electrical components are UL-listed and compliant with local codes. Always use safety gear, such as gloves, safety glasses, and insulated tools.
If you are unsure about any aspect of hot tub wiring or want professional assurance, consider consulting a Swimming pool and spa electrical installation expert.
A well-prepared workspace and clear documentation set the foundation for a safe and efficient installation.
Step 2: Turn Off Power and Prepare the Work Area
Safety is the top priority when handling hot tub wiring. Begin by shutting off power at the main service panel. Use a voltage tester to confirm all circuits are de-energized before touching any wires.
Implement lockout and tagout procedures to prevent accidental re-energizing. Mark the work area with caution tape or signage to keep others away during installation.
Keep the area dry and free of debris. Remove any standing water and ensure the ground is stable. Organize your tools and materials within reach but away from the hot tub’s edge.
A secure and organized workspace minimizes hazards and keeps your hot tub wiring project on track.
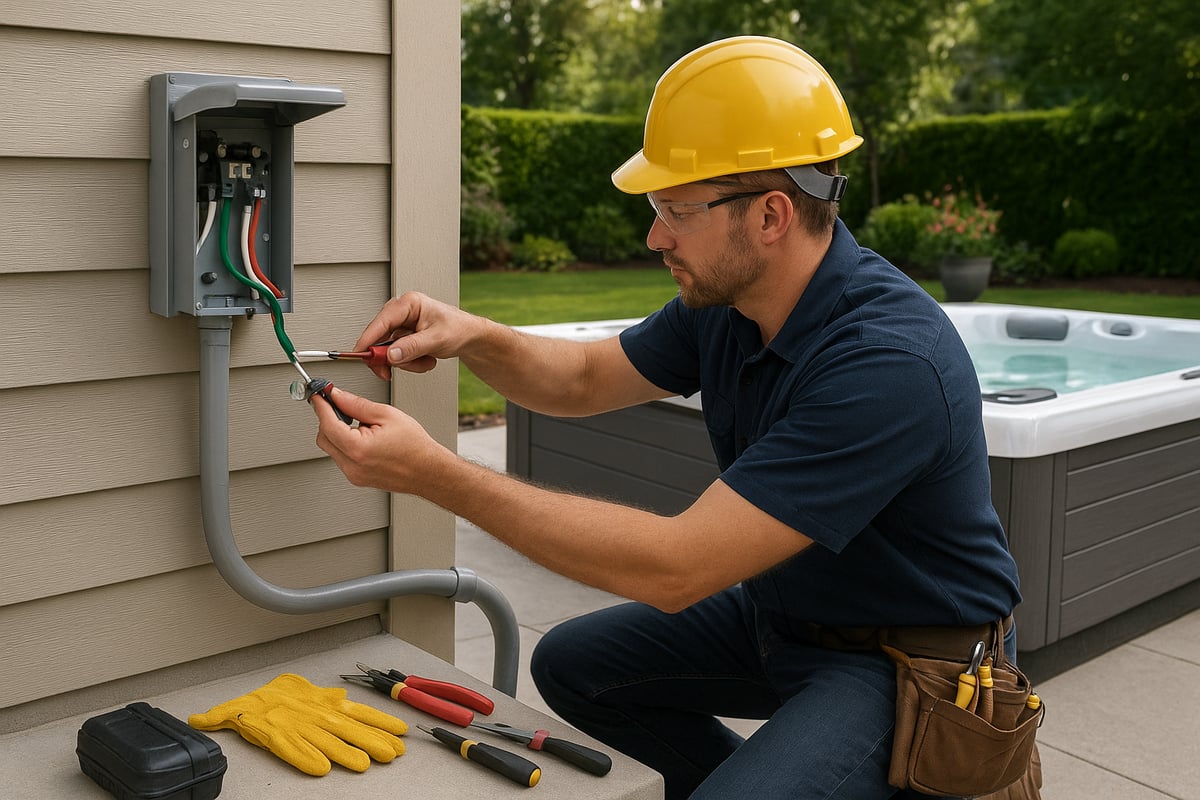
Step 3: Install the GFCI Disconnect Panel
A GFCI disconnect panel is required by code for all hot tub wiring projects. Select a weatherproof, UL-listed GFCI disconnect and mount it at least 5 feet from the hot tub, within line of sight.
Installation Steps:
- Mount the disconnect panel on a solid surface, following manufacturer instructions.
- Run conduit from the main service panel to the disconnect, using sweep elbows for easier wire pulls.
- Pull feeder wires (hot, neutral, ground) through the conduit, ensuring no sharp bends or damage.
- Connect wires securely to the corresponding terminals in the disconnect panel.
A disconnect panel provides both safety and convenience, allowing you to cut power quickly if needed. According to NEC 680.12, this step is mandatory for all spa installations.
Double-check connections and grounding to ensure your hot tub wiring meets code and prevents accidental shocks.
Step 4: Run Conduit and Wire to the Hot Tub
Select the appropriate conduit type—PVC for corrosion resistance or metal for added protection. For underground runs, bury conduit at the required depth (typically 18-24 inches) and avoid areas prone to flooding.
Pull wires through the conduit carefully, ensuring insulation remains intact. Use sweep elbows at corners to minimize wire stress. Secure the conduit along its route to prevent movement or sagging.
Wire Gauge Reference Table:
| Circuit Amps | Minimum Wire Gauge (Copper) |
|---|---|
| 40A | #8 AWG |
| 50A | #6 AWG |
| 60A | #4 AWG |
Label both ends of each wire to match the hot tub wiring diagram. Proper labeling simplifies later troubleshooting and maintenance.
With the conduit and wires in place, you are ready to connect to the hot tub control panel.
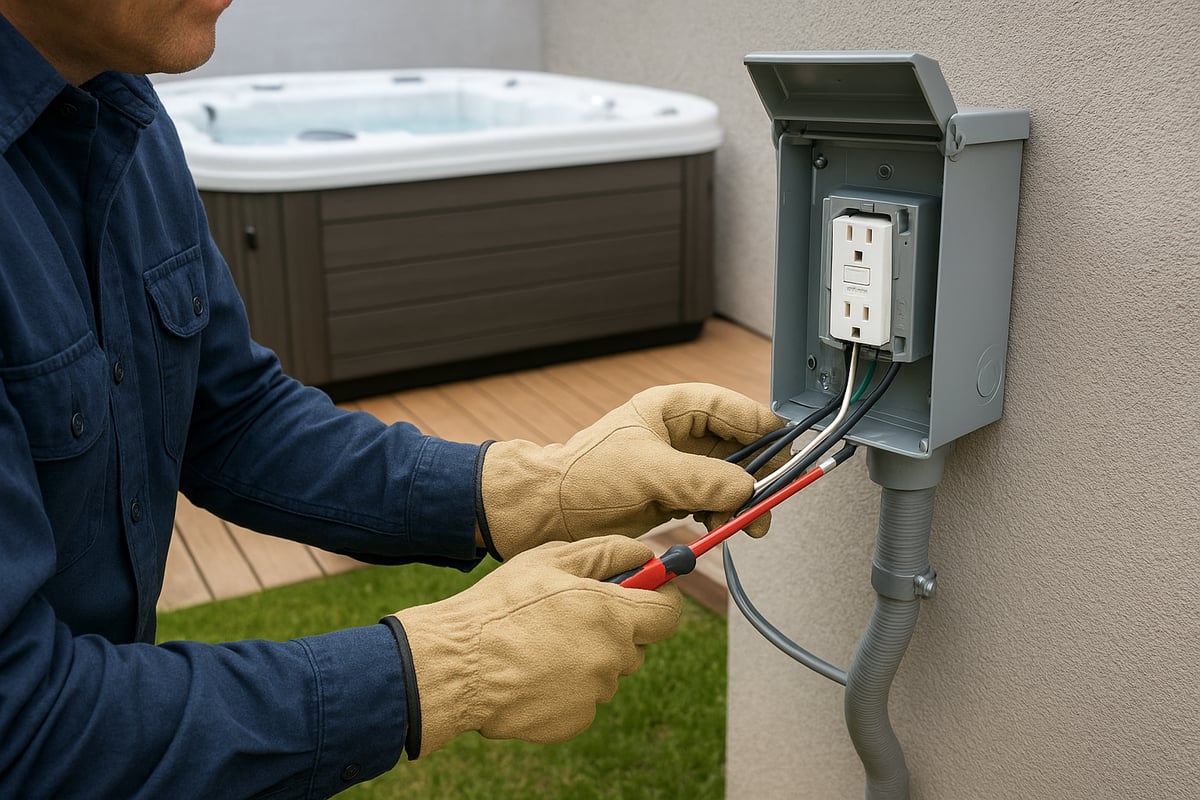
Step 5: Connect Wiring to the Hot Tub Control Panel
Open the spa control box and locate connection points for L1, L2, neutral, and ground. Reference the wiring diagram to confirm terminal locations.
Attach each wire securely to the proper terminal. For mixed-voltage spas, ensure 120V and 240V components are connected according to the manufacturer’s instructions.
Tighten all wire nuts and terminal screws. Loose connections can cause overheating and void your warranty. Double-check all connections against the wiring diagram before closing the panel.
If your hot tub wiring includes additional features (such as an ozonator or lighting), follow the manual for integrating these circuits safely.
Careful attention at this stage guarantees reliable operation and compliance with electrical codes.
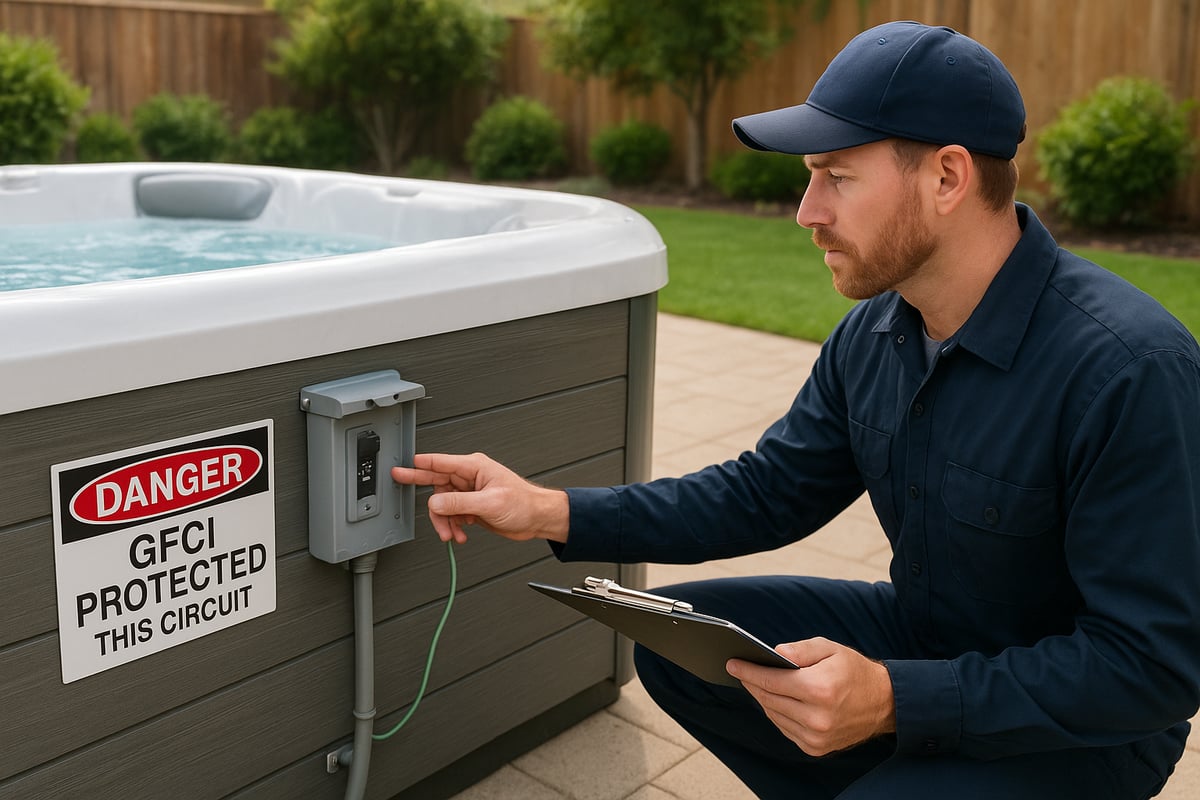
Step 6: Final Checks and Power-Up
With all connections complete, inspect the entire installation for safety and code compliance. Replace all covers and secure panels tightly.
Restore power at the main service panel and then at the GFCI disconnect. Test the GFCI function by pressing the "test" button; it should trip immediately. If not, review your hot tub wiring for errors.
Monitor the hot tub as it powers up. Watch for error codes, breaker trips, or unusual noises. If the system does not operate correctly, shut off power and re-inspect all connections.
Successful hot tub wiring ensures safe enjoyment and peace of mind for years to come.
Hot Tub Wiring Safety Best Practices for 2026
Hot tub wiring requires strict attention to detail and current safety standards. As technology evolves, so do electrical codes and best practices. Following these guidelines is crucial for protecting your family, your investment, and your peace of mind.
Electrical Safety Fundamentals
Water and electricity are a hazardous mix, making hot tub wiring safety non-negotiable. The primary defense against electrical shock is a properly installed GFCI (Ground Fault Circuit Interrupter), which instantly cuts power if an imbalance is detected. GFCIs are required by code for all spa installations.
Proper grounding and bonding are also vital. Grounding provides a safe path for stray current, while bonding connects all metal parts to eliminate voltage differences that could cause shocks. Only use UL-listed and code-approved parts for any hot tub wiring project to reduce risk.
Never use extension cords or undersized wiring. These shortcuts can overheat, posing fire and shock hazards. In fact, 70% of spa-related electrical accidents stem from improper hot tub wiring, according to a 2025 CPSC report.
Key safety steps include:
- Installing GFCI protection for all circuits
- Ensuring all wiring and components are rated for wet locations
- Bonding metal parts around the tub
- Keeping electrical boxes dry and sealed
By following these fundamentals, you significantly lower the risks associated with hot tub wiring.
Hiring a Licensed Electrician: When and Why
While some homeowners may feel confident handling basic projects, hot tub wiring is not a DIY job. Mistakes can result in severe injury, property damage, or legal trouble. Most municipalities require that all spa wiring be performed by a licensed electrician.
Hiring a professional ensures your installation meets the latest electrical codes, including grounding, GFCI, and disconnect requirements. This approach protects your warranty, keeps your insurance valid, and gives you peace of mind. In Toronto, for example, an ESA inspection is mandatory for every new spa installation.
When choosing a contractor, look for:
- Proper licensing and insurance
- Positive reviews and references
- Experience with hot tub wiring specifically
- Willingness to provide a detailed quote and code compliance assurance
For a detailed overview of code requirements and legal best practices, consult the Ontario electrical code compliance guide.
Trusting your hot tub wiring to a qualified electrician is the best way to ensure long-term safety, reliability, and compliance.
Common Hot Tub Wiring Mistakes to Avoid
Even small errors in hot tub wiring can have serious consequences. One common mistake is using the wrong wire gauge, which can cause overheating and frequent breaker trips. Skipping required permits or inspections is another risk, leading to fines and unsafe installations.
Improper GFCI placement or installation leaves users vulnerable to shock. Failing to bond all metal components around the hot tub can create dangerous voltage differences. Real-world incidents have shown that these mistakes often result in equipment failure or, worse, personal injury.
Always follow the manufacturer’s instructions, use the correct materials, and never cut corners. Prioritize safety by double-checking each connection and scheduling inspections.
Avoiding these pitfalls ensures your hot tub wiring remains safe, dependable, and up to code.
Troubleshooting and Maintenance Tips
Proper troubleshooting and regular maintenance are essential for safe, reliable hot tub wiring. Issues can arise unexpectedly, so knowing how to address them helps prevent costly repairs and ensures your hot tub provides years of enjoyment.
Diagnosing Common Hot Tub Electrical Issues
Electrical problems can disrupt your hot tub experience. Common symptoms include tripped breakers, a GFCI that won’t reset, or the spa failing to power on. Start by visually inspecting your hot tub wiring for signs of damage, moisture, or loose connections.
Use a voltage tester to check for proper voltage at the disconnect panel and control box. If the breaker repeatedly trips, moisture inside electrical boxes or a faulty GFCI breaker may be to blame. Make sure all wire nuts are tight and connections are secure.
If you’re unsure about the cause, consult home electrical troubleshooting tips for step-by-step guidance. Remember, never attempt repairs if you’re uncomfortable with electrical work. Addressing hot tub wiring issues promptly can prevent further damage and keep your spa safe for use.
Routine Electrical Maintenance for Hot Tubs
Regular maintenance is key for preserving your hot tub wiring and ensuring electrical safety. Inspect all visible wiring and connections annually, looking for wear, corrosion, or evidence of overheating. Test the GFCI monthly by pressing the “test” button, confirming it shuts off power correctly.
Keep all electrical components dry and protected from weather. Water intrusion is a leading cause of GFCI tripping and hot tub malfunctions. Schedule professional inspections for older installations or after severe weather events.
Annual maintenance can extend your hot tub’s lifespan significantly. Proactive care not only supports reliable hot tub wiring but also reduces the risk of electrical hazards, keeping your relaxation time worry-free.
Upgrading Hot Tub Electrical Systems for Efficiency and Safety
Consider upgrading your hot tub wiring if you plan to add new features, notice frequent electrical issues, or have an older system. Modern GFCI breakers and smart disconnect panels offer improved protection and diagnostics, making maintenance easier.
Energy-saving upgrades, such as installing timers, efficient pumps, or LED lighting, can lower your operating costs. Upgrading to a smart panel may reduce energy use by up to 15 percent, providing both safety and savings.
For added peace of mind, review hot tub electrocution statistics to understand why electrical safety upgrades matter. Investing in updated hot tub wiring helps ensure your spa remains a safe, efficient retreat for years to come.
Hot Tub Wiring Diagrams and Visual Aids
Understanding hot tub wiring diagrams is crucial for anyone planning a safe and code-compliant installation. Clear diagrams bridge the gap between technical requirements and practical setup, helping you avoid costly mistakes and hazards. Whether you are a homeowner reviewing your contractor's work or a DIY enthusiast, visual aids will guide you through each connection step.
Reading and Interpreting Hot Tub Wiring Diagrams
Hot tub wiring diagrams use standardized symbols to represent components, wire paths, and safety features. Recognizing these symbols is the first step to proper installation. For example, a ground wire is often shown as three stacked lines, while a GFCI breaker might appear as a rectangle with a test button. Here's a quick reference:
| Symbol | Meaning | Typical Use |
|---|---|---|
| ⏚ | Ground | Safety bonding |
| ▭ | GFCI Breaker | Shock protection |
| ⚡ | Hot (L1/L2) | Power lines |
| O | Neutral | Return path |
Modern hot tub wiring typically follows a 4-wire schematic: two hots (black and red), one neutral (white), and one ground (green). This setup supports 240V operation and complies with the latest 2026 NEC Changes Overview, which emphasize enhanced safety and proper GFCI placement.
A sample schematic for a 50A, 240V hot tub wiring project might look like this:
 Main Panel    GFCI Panel       Spa Control Box
  | L1 (Blk) ------ L1 --------- L1 Terminal
  | L2 (Red) ------ L2 --------- L2 Terminal
  | Neutral  ------ N ---------- Neutral Bar
  | Ground   ------ G ---------- Ground Lug
Always cross-check the diagram with your owner’s manual and actual labels inside the spa. This ensures connections are correct and reduces the risk of errors that could damage equipment or void warranties. Take your time, and do not hesitate to consult a professional if you are unsure about any step in the hot tub wiring process.
Visual Examples of Safe and Unsafe Installations
Visual aids are invaluable for distinguishing between safe and hazardous hot tub wiring practices. Code-compliant installations feature organized wires, proper conduit, and securely mounted GFCI disconnects at the correct distance from the spa. In contrast, unsafe setups often show tangled wires, exposed conductors, or makeshift weatherproofing.
Common hazards found in unsafe installations include:
- Exposed or frayed wires near water sources
- GFCI panels mounted too close to the hot tub
- Missing or incorrect grounding and bonding
- Overcrowded or unlabeled control panels
Before-and-after photos can highlight how professional installation transforms a cluttered, risky setup into a neat, code-compliant system. Use these visual references when planning your hot tub wiring project, ensuring every detail matches both diagrams and safety standards.
When working on your own, keep printed diagrams and photos of correct installations nearby. This practice makes troubleshooting easier and helps maintain compliance with the latest regulations. Safe hot tub wiring is not just about following steps, but about understanding the visual cues of a job done right.
You’ve now seen just how important proper hot tub wiring is for both safety and lasting enjoyment—especially with the latest 2026 standards and code updates. If you’re feeling unsure about your home’s electrical capacity or want peace of mind that every connection is safe and fully compliant, you don’t have to tackle it alone. Let a trusted professional handle the details so you can focus on relaxing in your new spa. For expert, code compliant service you can trust, Contact a Licensed Electrician
today and ensure your hot tub installation is done right from the very start.